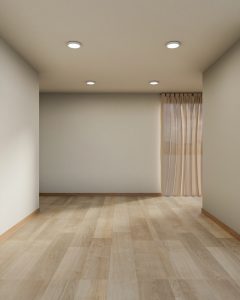
You might think floor sanding is just about aesthetics, but it’s truly about rejuvenation. When you sand your wooden floors, you’re not only erasing years of wear and tear but also revealing the fresh, untouched wood beneath. This process involves removing old finishes and imperfections with specialized equipment, gradually smoothing the surface. It’s about preparing the wood for a new finish that offers both beauty and protection. How does this transformation affect the longevity and appeal of your floors? Let’s explore the intricacies of each step and how they contribute to a floor’s revival.
Understanding Floor Sanding Basics
Floor sanding is an essential process in restoring the natural beauty and longevity of wooden floors. To achieve optimal results, you need to understand the various sanding techniques and equipment types available.
Initially, selecting the right sanding technique is crucial. Begin with coarse-grit sanding paper to remove old finish and level the floor. Progressively move to finer grits to smooth out scratches and prepare the surface for sealing. The sequence typically involves three stages: coarse, medium, and fine sanding. This graduated approach ensures a uniformly smooth surface, ready for finishing.
Choosing the right equipment is equally important. Drum sanders are powerful and ideal for large, open areas with significant wear or damage. They require careful handling to avoid gouging the wood.
For edges and corners, use an edge sander, which is smaller and designed to operate in tight spaces. Random orbital sanders are versatile and user-friendly, suitable for final smoothing and detailing. Their circular motion minimizes scratch patterns.
Always ensure your equipment is in good condition, and consider renting if you lack access to professional-grade machines. By mastering these techniques and equipment types, you’ll effectively restore your wooden floors.
Assessing Floor Condition
Before embarking on the sanding process, thoroughly evaluate the floor’s current condition to determine the appropriate restoration approach. Conducting a floor inspection allows you to identify any underlying issues that might affect the outcome of the sanding.
Pay close attention to the type and extent of wear, damage, and any existing finish. A detailed damage evaluation is crucial to decide if sanding alone will suffice or if additional repairs are necessary.
During your assessment, focus on the following key aspects:
– Surface Scratches: Identify light surface scratches that can be sanded out easily, versus deep gouges that might require more intensive repair.
– Stains and Discoloration: Look for water stains, pet stains, or discoloration that could affect the floor’s final appearance post-sanding.
– Warping or Cupping: Examine for any warping or cupping of the boards, which might indicate moisture problems that need addressing before sanding.
– Loose or Damaged Boards: Check for loose boards or those that are severely damaged, as they may need to be replaced prior to sanding.
Preparing the Room
To ensure a successful floor sanding process, begin by thoroughly preparing the room. Start with furniture removal to create an unobstructed workspace. Carefully relocate all items, including rugs, curtains, and wall hangings, to prevent any interference with the sanding equipment. Consider using protective covers for any immovable fixtures, such as built-in cabinets, ensuring they remain unscathed during the process.
Next, focus on dust protection, as sanding generates significant airborne particles. Seal doorways and vents using plastic sheeting and painter’s tape to contain the dust within the workspace. This step is crucial to prevent the spread of dust to other areas of your home, which can be both a nuisance and a health hazard. You might want to employ a dust extraction system designed for floor sanding, as it efficiently captures debris at the source.
Verify the room’s lighting and ventilation conditions. Adequate lighting helps identify imperfections on the floor surface, while proper ventilation reduces dust accumulation and enhances air quality during sanding.
Clear any clutter from the room to maintain safety and efficiency. With these preparations, you’ll set the stage for a seamless and effective floor sanding experience.
Sanding Process Explained
With everything in place for the sanding process, you’ll want to start by selecting the appropriate grit sandpaper for your floor’s condition.
Begin with a coarse grit if your floor has significant damage or old finishes. Utilize medium grit to smooth out any roughness, and finish with fine grit to achieve a polished look. Mastering sanding techniques is crucial for an even, professional result.
As you sand, always move with the grain of the wood to prevent scratches and gouges. Employ a drum sander for large areas, and an edge sander for corners and tight spaces.
To ensure even sanding:
– Overlap passes: Overlap each pass slightly to avoid streaks.
– Constant motion: Keep the sander moving to prevent uneven spots.
– Check progress: Regularly inspect the surface for consistency.
– Mind the edges: Use a scraper or hand sander for tricky edges.
Dust control is vital during sanding. Connect a dust extraction system to your sander to minimize airborne particles.
Regularly empty the dust bag to maintain efficiency. If you don’t have a dust extraction system, wear a mask and ventilate the area thoroughly. Taking these steps ensures a clean, smooth surface ready for the next stage.
Selecting the Right Finish
Once you’ve completed sanding your wooden floors, selecting the right finish becomes a critical step in enhancing both their durability and aesthetics. You have two primary options: oil finishes and water-based finishes. Each has unique properties that can affect the final outcome of your project.
Oil finishes penetrate deeply into the wood, enhancing its natural grain and providing a warm, rich tone. They’re renowned for their durability and ability to withstand heavy foot traffic. Applying an oil finish involves more labor, as it requires multiple coats and meticulous drying times, but the result is a classic, timeless look.
This finish also allows for easy spot repairs, ensuring your floor remains pristine over time.
On the other hand, water-based finishes are known for their quick drying times and minimal odor. They offer a clear, non-yellowing coat that maintains the wood’s natural color. Ideal for lighter woods, water-based finishes provide a sleek, modern appearance.
They’re also eco-friendly and easier to apply, making them a popular choice for DIY enthusiasts.
Ultimately, your choice between oil and water-based finishes should align with your aesthetic preferences, maintenance willingness, and environmental considerations.
Carefully weigh these factors to achieve the desired look and longevity for your floors.
Benefits of Sanding Floors
Sanding your wooden floors offers numerous benefits that extend beyond just improving their appearance. By investing in this process, you’re enhancing both the functionality and longevity of your floors.
First, sanding makes your floors more cost-effective by preventing the need for premature replacements. It eradicates surface imperfections, which can exacerbate wear and tear.
Moreover, sanding has a positive environmental impact. Instead of discarding and replacing entire floorboards, you’re conserving resources by restoring them. This not only reduces waste but also minimizes the demand for new lumber, preserving forests.
Here are a few more benefits you’ll gain from sanding:
– Increased Durability: Sanding removes surface damage and smooths out the wood, making your floors more resistant to future wear.
– Enhanced Safety: Uneven floors and splinters are safety hazards. Sanding levels the surface, eliminating these risks.
– Improved Aesthetics: Sanding reveals the natural beauty of the wood grain, enhancing your home’s visual appeal.
– Better Finish Adherence: A smooth, sanded surface ensures that finishes adhere more effectively, maximizing their protective properties.
Maintaining Restored Floors
After you’ve revitalized your wooden floors through sanding, it’s crucial to implement a robust maintenance routine to keep them looking their best. Preventive care is your first line of defense against wear and tear. Place protective pads under furniture legs to avoid scratches and consider using rugs in high-traffic areas. This minimizes direct contact with abrasive particles that could mar the finish.
When it comes to cleaning techniques, use a microfiber mop or soft-bristle broom for daily dusting. This removes dirt without damaging the surface. For deeper cleaning, a damp mop with a pH-neutral wood floor cleaner is ideal. Avoid excess water, as it can seep into seams and cause warping. Always follow the grain of the wood to maintain its natural texture.
Regularly inspect your floors for signs of damage like scratches or dullness. Promptly address these issues with touch-up kits or professional refinishing if necessary.
Seasonal changes in humidity can also affect your floors, so maintain a consistent indoor climate to prevent expansion or contraction. By adhering to these preventive care measures and cleaning techniques, you’ll ensure your restored floors remain pristine for years to come.
Frequently Asked Questions
How Often Should Floor Sanding Be Done?
You should sand your floors every 5-10 years, depending on usage and floor maintenance. Regular inspections help determine the need. Mastering sanding techniques ensures optimal results, preserving floor integrity while enhancing appearance and longevity.
Can Floor Sanding Fix Water Damage on Wooden Floors?
When tackling water damage, floor sanding isn’t a silver bullet, but it helps. You remove the damaged layer, applying repair techniques like drying and sealing. This process enhances the wood’s appearance and stability, restoring its former glory.
Is Professional Floor Sanding Environmentally Friendly?
Professional floor sanding can be environmentally friendly when you use eco-friendly materials and effective dust management systems. These practices minimize waste and pollution, ensuring a sustainable process while maintaining your wooden floors’ beauty and integrity.
What Safety Precautions Should Be Taken During Floor Sanding?
Ensure dust protection by wearing a mask and sealing off work areas. Prioritize equipment safety by checking tools for defects and using protective gear. Always follow manufacturer’s guidelines to prevent accidents during floor sanding. Stay informed, stay safe.
How Long Does the Floor Sanding Process Take?
Time flies when sanding techniques and floor preparation are like a well-oiled machine. Typically, the process takes 1-3 days, depending on your floor’s condition and size, ensuring a professional finish with minimal disruption.
Conclusion
You’ve journeyed through the intricate dance of floor sanding, uncovering your floor’s hidden beauty. With precision and care, you’ve sanded away imperfections, revealing a canvas ready for a protective finish. Choosing the right finish not only enhances durability but also seals in the elegance of your revitalized floors. Remember, maintaining this newfound charm requires regular care, ensuring your floors remain a testament to craftsmanship and resilience, standing the test of time like a timeless work of art.